Sunday, March 30, 2014

K/1 Bird Puppets

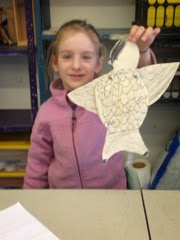
The K/1s are creating tagboard articulated puppets with flapping wings in conjunction with their classroom bird study. Working from a photo of the bird they're investigating, they are accurately coloring their puppet to look like their particular bird. The body and wings are cut out, the wings attached with brass fasteners, and a string tied to the back to allow the wings to flap up and down.

A sparrow emerging

An owl with delineated feathers

Cutting out the body

Cutting around the tail

Finished chickadee

Middle School Self-Portraits

The annual Parker self-portrait project has begun for the middle school students. The students watched a video on how different expressions change the features of a face and then reviewed rule of thumb methods for placement and proportion for achieving their likeness. They worked from mirrors, thinking about the shape of their face and trying to accurately locate and capture their features. They tried to put all these elements together to create an image that is recognizable as them.

First sketch

Focusing on the features

A definite resemblance

Adding some dark and light values 


Matching up the ears

Tuesday, March 11, 2014

4th - 8th Grade Paper Quilling

Paper quilling began in the Renaissance and was picked up in Colonial America. It is done by rolling and gluing thin strips of paper into assorted shapes and gluing them down to create figurative or abstract designs. The 4th through 8th grade students tried their hands at this unusual craft, coming up with some highly original pictures including some strips that worked their way into the three-dimensional realm.

Making a tight coil

Gluing a construction together

Working on a composition

A large symmetrical design

Saturday, March 8, 2014

K/1sand 2/3s Invent a Scene Through a Window

Imagination can take you anywhere. The K/1s and the 2/3s were asked to imagine a scene outside a window. It could be anything from a dragon to a flower garden, but they would draw it as though they were seeing it through a window. Then a frame with shutters was glued over the scene picture so it could be opened to reveal whatever they had invented. Their drawings were as varied as are the kids!

Watching the magic of watercolor pencils

A flower and vegetable garden out this window

Picture with the shutters glued on

Lots of concentration and detail here

Some final touches on the scene

Thursday, February 13, 2014

2/3s Become Familiar with Marc Chagall's Paintings

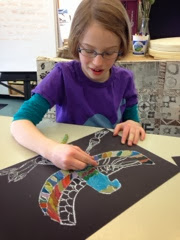
The Russian artist, Marc Chagall, painted whimsical fantasies based on recognizable images; weightless people flying through the air, cows in the sky, off balance buildings, etc. After looking at his art and learning about his life, the 2/3s tried their hand at a similar whimsical composition working with oil pastels on black construction paper.

A flying critter

Underwater castle!

Two layers of color give a richness to these pictures

A bird with an Egyptian motif

K/1s Become Illustrators

After the K/1s spent time studying animals of the Northeast, each student wrote a short work of fiction with their animal of study as the central character. They brought these books to art class where they became author illustrators, paying attention to the text on each page and drawing pictures that related to the text.

Adding the illustrations

Concentrating on the color

Sunday, February 2, 2014

4/5s Repousse Designs

Incas, Aztecs and Maya are the topic of study in the 4/5 classroom. These early civilizations had intricately patterned deities often involving images of birds, snakes, spears and more. Taking image ideas from these cultures the students are designing 6"x6" squares to transfer to soft copper plates where they'll inscribe them in the art form known as repousse. The copper is placed on a surface of newspapers and pressed with an implement to push the design from the back to the front. As the plate is turned over it can be worked in both directions. The final result is a finely patterned design in low relief that is inked and wiped then down so the ink remains in the indented areas.

Pencil design in a square format

Project beginnings

Applying a coat of ink

Wiping the ink off selected areas