Thursday, January 22, 2015

4/5s Learn About Ted Harrison

In keeping with our wintery theme for this chilly January, the 4/5 students looked at the colorful and somewhat stylized landscape paintings of the Canadian artist Ted Harrison. They noticed Harrison's way of breaking up areas into horizontal bands of color, separated by distinct lines. They sketched out ideas based on his work, made final drawings, went over pencil lines with white crayon to retain the separate areas, and painted with liquid watercolors that have the capacity to be quite intense. 

After all the lines are drawn, adding color

Beginning to paint

Different areas of blues

An atmospheric sky


A finished landscape showing distinct separation of color areas

One more

K/1s Make Paper Mache Owls

After a rather extensive two-dimensional owl exploration, the K/1s are building small paper mache owls. Beginning with a cardboard tube, they added newspaper layers to plump out the body, then worked in wings and feet and will end with paint in owl colors and textures. Getting used to the paper mache glue was a new sensation for many of the students!

First coat of paper mache

Squeezing back the excess glue

Covering the head

Some wing cutting advice

Gluing the wings on the owls

A solid coat of paint for a snowy owl

Focused on the right colors

With eyes and a beak

Complete!

Saturday, January 17, 2015

2/3s Draw Dinosaur Skeletons

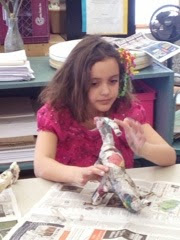
A dinosaur study is beginning in the 2/3 class. Investigations are happening in science and the classroom, while in art class renderings of the dinosaur each student is studying are underway. Each child  drew the skeleton of their dinosaur, just like you see in the museums. When the drawing is finished, the students will build a paper mache model.

Discovering the ins and outs of the dinosaur's spine

Increasing the intensity with Sharpie

Working on the vertebrae

Building the armature for the paper mache dinosaur

Attaching legs with masking tape

Getting the right body shape

Beginning paper mache

Smoothing the head

Adding plates down the back

Finishing touches to the paper mache

Painting in all the small spots

A new angle

First pass at painting

A herd of dinos!

Tuesday, January 6, 2015

Polar bears in Winter for 4/5s

With watery blue and purple paint the 4/5s created polar landscapes. They salted the watery sky to look starry and placed plastic wrap over the bottom to look icy. Polar bear stencils were drawn and cut and thick white paint was dabbed on the background using the bear stencil to finish the scene. There were numerous steps to this little project, but everyone helped each other and the pictures are beautifully atmospheric and wintery.

The watery purple sky

Adding a moon

Two finished pictures

K/1s and 2/3s Look Closely at Owls

Two borrowed rather realistic looking stuffed owls have taken up temporary residence in the art room tying in nicely to the K/1 owl study unit. The 2/3s are taking advantage of the owls to also get a close look and try their hand at drawing them with charcoal and pastel. Basic shapes and textures have been noted and the sides and ends of the chalks have been used to get the fluffy feeling of these birds feathers as well as their sharp beaks and claws.

The great horned owl's horns

Feather texture

Gaining control of the charcoal

Forming a beak

Pastels on black paper

Blending colors

Noticing lots of details on the feathered chest

One section of the finished owl wall

Saturday, December 20, 2014

Middle School Geometric Line Drawing and Painting

After the "Drawing from a Bag" exercises the students select four or five objects to fill a page in a proscribed fashion, with some objects extending off the paper, others touching an edge, etc. The page is then divided into fourths and then each quadrant is divided on a diagonal. The students then pick a complementary color scheme and paint the composition changing colors each time they cross a line. This exercise helps develop critical thinking skills, increases perception and requires decision making in terms of the objects selected and how they are arranged.

Observing and drawing the pliers

Drawing the cheese slicer with all its detail


Checking out a faucet handle

Working out the overall compositon

Painting with a complementary color scheme

Working in the third quadrant

Wednesday, December 17, 2014

4/5 Historical Character Masks

As each 4/5 student studies a specific historic figure in the classroom, they are crafting a paper mask of their person in art class. After observing the features particular to their individual, they are cutting, folding and gluing their papers to create some remarkable likenesses while learning about symmetry and the possibilities of paper. This project requires quite a bit of planning ahead and figuring out how to construct the desired features and then assemble them so the face can be recognized. 

Gluing some features

Eyebrows!

A finished mask

Susan B. Anthony

Hair in a bun on this one