Monday, March 23, 2015

K/1s and 2/3s Paint Self-Portraits

Annually all Parker students in grades K-8 draw or paint a head and shoulders self-portrait. It is wonderful to see them all displayed in the hall and to notice the developmental differences through the grades. The portraits are then turned into the next year's school calendar. The K/1s and 2/3s begin this lesson by looking in the mirror and noticing the shapes they see and where their features are in relation to one another. They first do a sketch, then draw their image and finally add tempera paint.

First sketch

Careful observing in the mirror


Checking with the mirror

Beginning to add paint

Painting the skin tones

Deciding what's next

Moving to final paper

Trying to make sure the mirror and drawing images match up

Matching skin tones

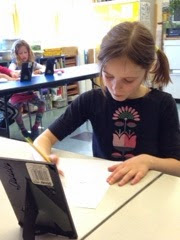
Concentrating on small details

Tuesday, March 10, 2015

K/1 Tooth Fairies

A unit on fairy tales is unfolding in the K/1 classroom as the students learn about tooth traditions from around the world in art class. They listened to Throw Your Tooth on the Roof by Selby Beeler and remarked on the different traditions from all over the globe observed when children from other countries lose their teeth. A discussion of the tooth fairy followed and the students began sketching out ideas for paintings of their visions of the tooth fairy.

collaborative color choice

Painting the fairy's wings

Outlining with Sharpie
Beginning to paint

One finished painting

And another!

4/5 "If" Paintings

Based on a reading of the book If by Sarah Perry, and a look at some of the work of Belgian Surrealist painter Rene Magritte, the 4/5 students drew their own versions of surrealistic possibilities. They sketched out several ideas and committed one to final paper drawn carefully in colored pencil.

Checking out the book

What if there was a river of candy?

Mine craft related

A chocolate keyboard!

Saturday, February 28, 2015

4/5 Wycinanki Cut Outs

Wycinanki is a Polish word for paper-cut designs. These beautiful paper cut-outs have been used to decorate the interior of Polish homes since the early 19th century! The 4/5s tried their hand at their own Wycinanki designs. They drew out their idea, copied it onto colored paper, carefully cut away the negative areas, and then glued it to a contrasting backing paper.

Completed


Unfolding the cut design

Checking the cuts

Another finished work

Saturday, February 14, 2015

Middle School Students Sculpt Food

An introduction to Pop Art and the large food sculptures of Claes Oldenburg, were the jumping off point for the middle school students to begin a unit on sculpting food. After a demonstration of the sculptural possibilities of working with water and strong toilet paper, the students sketched out a couple of ideas and began building their creations. Realizing that one key to success is using as little water as possible, the forms of bagels, pizza, fish fries and bowls of ice cream began to take shape. Once the proper form is achieved, the items will be painted and arranged on plates to look like the real meal!

Getting the feel for this unusual medium

Building an Oreo


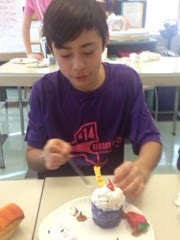
Painting a muffin top

Adding the final glaze coat

A dish of pasta and meatballs

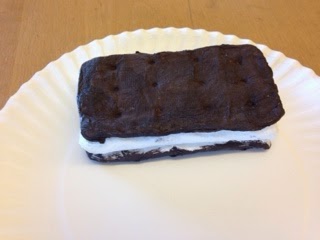
Yummy ice cream sandwich

Cherry pie a al mode

Donuts!

Thursday, January 22, 2015

4/5s Learn About Ted Harrison

In keeping with our wintery theme for this chilly January, the 4/5 students looked at the colorful and somewhat stylized landscape paintings of the Canadian artist Ted Harrison. They noticed Harrison's way of breaking up areas into horizontal bands of color, separated by distinct lines. They sketched out ideas based on his work, made final drawings, went over pencil lines with white crayon to retain the separate areas, and painted with liquid watercolors that have the capacity to be quite intense. 

After all the lines are drawn, adding color

Beginning to paint

Different areas of blues

An atmospheric sky


A finished landscape showing distinct separation of color areas

One more

K/1s Make Paper Mache Owls

After a rather extensive two-dimensional owl exploration, the K/1s are building small paper mache owls. Beginning with a cardboard tube, they added newspaper layers to plump out the body, then worked in wings and feet and will end with paint in owl colors and textures. Getting used to the paper mache glue was a new sensation for many of the students!

First coat of paper mache

Squeezing back the excess glue

Covering the head

Some wing cutting advice

Gluing the wings on the owls

A solid coat of paint for a snowy owl

Focused on the right colors

With eyes and a beak

Complete!